Showing posts with label Bonjour BuJo. Show all posts

May 26, 2017

Bonjour BuJo (n°9): The Collections


Readers, you have spoken. It seems you enjoy bullet journaling just as much as I do. I know it has been several weeks since I've talked bullet journals on the blog, but today I'm back with one of my absolute favorite reasons to bullet journal - the collections. And you will see soon that several of my collections have a little French flair. :) 

You've set up the key. Your index is in place, and your future log is ready to keep you on track for any important dates coming your way. A monthly spread is ready for the start of a new month, and you're playing with some daily layouts or your simply letting it flow. These are the bullet journal essentials. You could stop here and have a fully functioning journal. But if you're anything like me, you're in to spicing things up a bit!

This is where the collections come in. I went back to the source for all things bullet journal to see how they defined collections:
Sometimes you’ll have notes and tasks that are related by a common theme or purpose. Rather than having all these related entries scattered across your Bullet Journal, simply create a Collection Module. Collection Modules, or Collections, are great for organizing specific lists (shopping list, reading lists etc), classes, and projects.
I've already talked collections on the blog, though I don't know that I called them by this name. You might remember my post about using your bullet journal to log your reading, or my post about using my journal to plan for Paris. Both of these are examples of collections in my journal. How do you start a collection? Go to the next blank page, make a heading, and index it. It can be smack dab in the middle of any month. By indexing it, you will be able to easily return even months down the road. With collections, they sky is truly the limit. This is where you take your bullet journal and customize it for your goals, interests and passions. 

Here are some other ways I have used collections in my journal:


(Places to Visit in Paris & Francophile Finds - a few of my very first collections.)

(a list of ways to live Simply Luxuriously every day)

(Food for Thought inspired by Fiona Ferris)

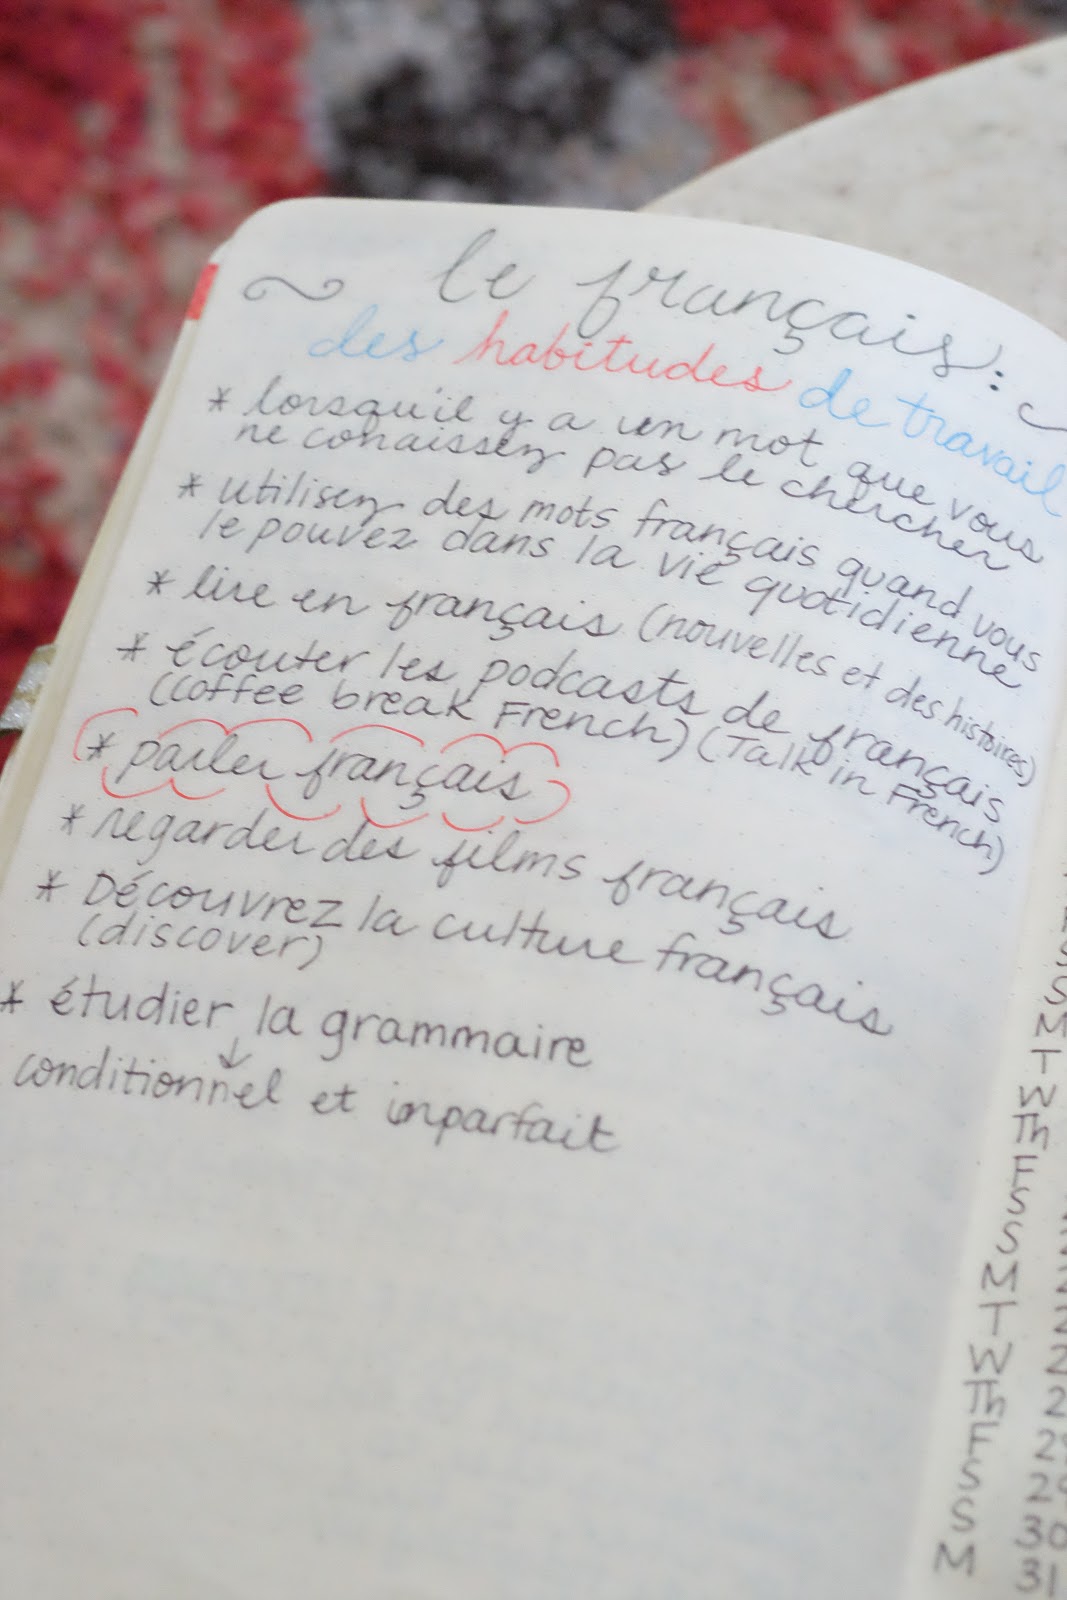
(le Français: des habitudes de travail - French study habits)

(inspiration for finding peace)

(Capsule Wardrobe - notes and inspiration from The Curated Closet)

And a few collections in my new journal:

(one month until Paris to-do list & my packing list)

Collections are as useful as they are fun. I hope my ideas here give you a place to start, but I know you could think of collections that would inspire me, too! If you do, please post them on Intagram with #FdSTLbujosetupseries. I would love to see them! Have a beautiful weekend!

Warm wishes from me to you, and happy journaling!


May 13, 2017

Bonjour Bujo (n°8): Setting Up the Dailies

(My lettering here was inspired by the beautiful work at Get To Work Book. I just put my own spin on it!)

Bonjour, journalers! Today's post is n°8 in the BuJo Set Up Series. After today, you will have all of the essentials you need to have a fully functioning bullet journal. Of course there are extras, but there is plenty of time for those once you journal for a while and get a feel for what works for you best.

The dailies will take up most of your journal. This is where you get the specifics down - plans, to-do's, notes, inspiration, and reflections for each day. There are several ways to go about setting up the dailies. When I started my journal, I was more of a "let it flow" girl. I would create a daily header (ex. Saturday 10.29.16) and then truly let it flow from there. Some days I would use the whole page. Some days I would only use a few lines. Wherever I left off at that day's end, I would create the header for the next day and continue the flow. This method definitely has its benefits. The freedom to journal in more detail was my favorite part. I could really reflect on my day, write down inspirational quotes from my reading, etc. Reading back on these is always a lot of fun. Here are some examples where I let it flow with my dailies: 


I found that once school was in full swing, I wanted to be able to see and plan my whole week. When you let it flow, this isn't possible. Of course you can always refer to your monthly spread, but for me that wasn't the same as seeing my week at a glance. This is when I transitioned into daily spreads. I could lay out the entire week on a Sunday night and be all set. This is also beneficial when your weeks get too busy to make heading designs daily. Of course the drawback to the spread is the pro of letting it flow: you lose out on space to really go deep on the journaling. It becomes more of a quick list. I do find, however, that weekly spreads look incredibly beautiful. Here are some of my weekly spreads: 


As is the case with all things bullet journal, there is no right way to do this. As I transition into summer, I can see myself getting back into the "flow" because I will have more time to slow down and reflect. As I have said time and time again, it's really about what your needs are and what works best for you... AND you can always change it up whenever you feel. :)

I hope you are enjoying your journaling process! In case you didn't catch the other posts in the BuJo Set Up Series, I will link them below. Thanks so much for stopping by. I would love to see images of your journal! Tag them on Instagram using #fdstlbujosetupseries. 

Warm wishes from me to you,


Fleur de St. Louis BuJo Set Up Series:
*Bonjour BuJo n°2: Journaling Essentials (and extras)
*Bonjour BuJo n°4: Setting Up the Key
*Bonjour BuJo n°5: Setting Up the Index
*Bonjour BuJo n°6: Setting Up the Future (& Birthday) Log
*Bonjour BuJo n°7: Setting Up the Monthly Spread

May 7, 2017

Bonjour BuJo (n°7): Setting up the Monthly Spread


Bonjour, fellow bullet journalers! It's been about a week since the last Bonjour BuJo set up post, and I am excited to announce that in just one more post after today, your journal will be fully up and running! Of course I will come back every now and then with tips that will help you personalize even more to fit your specific needs. :) 

Today, I'm showing you my monthly spreads. Immediately following my future log is my first monthly spread of the journal. This spread introduces a new section. It also acts as a more detailed future log for that specific month. I never set up my entire month at once, so sometimes I need to note down plans with friends, events, and appointments here. The future log does this on a much grander scale. The monthly spread allows you to begin to zoom in on that particular month in more detail. 

People lay out their monthly spreads in tons of different ways. A simple Pinterest search of "bullet journal monthly" reveals a wide variety of layouts, colors, elements, etc. I was really drawn to this particular image, and it inspired my February 2017 monthly. (Note that I often write days, months, etc. in French in my journal. I'm always looking for ways to add that bit of French flair!) Not only did this layout function beautifully, it inspired me to start using a monthly color scheme. The pens and highlighters chosen for this spread were carried throughout my February dailies as well (more to come on this). I loved this layout and color scheme idea so much, I've been using it ever since. It works for me. This is not to say I won't ever venture out and try something new, but for the time being I am consistently happy with this approach.

Below are photos of my February, March, April and May monthlies. One night this week, I got so excited for June (this is when my boyfriend and I leave for our European adventure) that I went ahead and laid that monthly out as well. I can't wait to share it with you. It is one of my favorites so far, and you will instantly see why. :) 


I return to this spread each week as I am planning. I love the little gold binder clips from the dollar section at Michael's. I always clip it around the monthly and the current week for easy access. My best advice when it comes to monthly spreads is to seek out inspiration and find something that functions well for you. And remember, you are always free to make a change in the new month. 

If you are following along and setting up with me, I would love to see your monthly spreads. Tag your images on Instagram at #fdstlbujosetupseries, or click this tag on my journal posts to see all of my images together. 


Warm wishes from me to you.
You're almost all set up!
Lauren 

April 29, 2017

Bonjour BuJo (n°6): Setting Up the Future (& Birthday) Log


Rainy Saturdays call for time to slow down. With the Gilmore Girls keeping me company, I'm wrapped up in my favorite soft blanket and journaling away. In case you are spending your Saturday similarly, I wanted to get the next step in the BuJo set up series up on the blog. 

My goal today was to share my future log, but then a happy accident occurred. As I finished drawing out my future log spreads (intended for pages 1-4), I realized I had accidentally skipped pages 1-2. Now my future log was on pages 3-6 and I had two hanging pages. I told you, these things happen constantly. No worries, though, because there is always a creative solution. I had been wanting to include a birthday log in this journal anyway, so rather than place it after the future log I used those two blank pages and placed it before. Problem solved, and now you get a bonus BuJo feature! 

(Future Log)

The future log is not something that all journalers have found useful. I, however, used this tool regularly in my first journal and knew I would want to incorporate it again. The purpose of the future log is to have a space where you can jot down events & important dates that are occurring in the future. This is handy because the bullet journal is created as you go. When I'm creating pages for June but make a hair appointment for August, I want to be able to get that date down so I won't forget later. The future log is just the spot. 


(Future Log - This cute washi was purchased at Hobby Lobby.)

The future log begins the month your journal begins. Because I will be starting to use this journal in June, my future log starts with June and runs through January. I set it up for eight months in my first journal and that was just about perfect (I ended up squeezing in one more month). I went with eight months again here. I was inspired by a layout I saw on Pinterest and decided to carry out the color scheme & theme I had use on the rest of my "set up" pages. Schemes & themes keep me from getting lost in all of the possibilities. I will talk more about this when we set up our monthly and daily spreads. I'm not exactly sure what I will do with the "notes" section, but I like how it visually balanced out the layout. If I don't use it, I won't include it next time. It's that simple. 

(Birthday Log)

And now to make those two blank pages look like they had an intended purpose all along! They made the perfect home for this simple but handy birthday spread (which uses a Create 365 stamp set purchased at Michael's and Versa Magic ink). I love doing small, fun things for my family and friends to make their birthdays extra special. This will help me keep track of all of those very special dates. (The cake stamp pictured is from a set I found in the dollar bin at Target.) 

I hope you are enjoying your Saturday, rain or shine. Whatever you are doing, I hope it is exactly what you needed. :) Happy journaling, and please share your layouts and designs with me. I would love to see! You can tag your photos with #fdstlbujosetupseries on Instagram. Thank you for reading and sharing!

Warm wishes from me to you,
Lauren 

April 27, 2017

Bonjour BuJo (n°5): Setting Up the Index


Bonjour fellow bullet journalers! I hope you enjoyed creating your keys. :)

Today we move to the next step of bullet journal set up, the index. If you went with the Leuchtturm1917 journal, this step won't apply to you as your journal has a built in Index. You are already set up and ready to go! For anyone working with a Moleskine like me or any other plain journal, a little set up will be necessary but will also take you a long way. 

The index is just that - a place to keep track of the location of various calendars, monthly plans, daily plans, lists, etc. in your journal. Every page in the journal (beginning after the index) is numbered. I love numbering by hand, but again my Leuchtturm friends have another box already checked with pre numbered pages! You record the contents of the page and its number or number range here. Below is a photo of the index in my first bullet journal - very simple. I set aside four pages and labeled each index across the top. It looks like I will only end up using two pages, but it's better to have extra space than not enough. You can see that I distinguished the start of a new month with colored boxes. Along the way, I also put little symbols to the left of pages I found myself referring to often. There's that evolution again. :) 


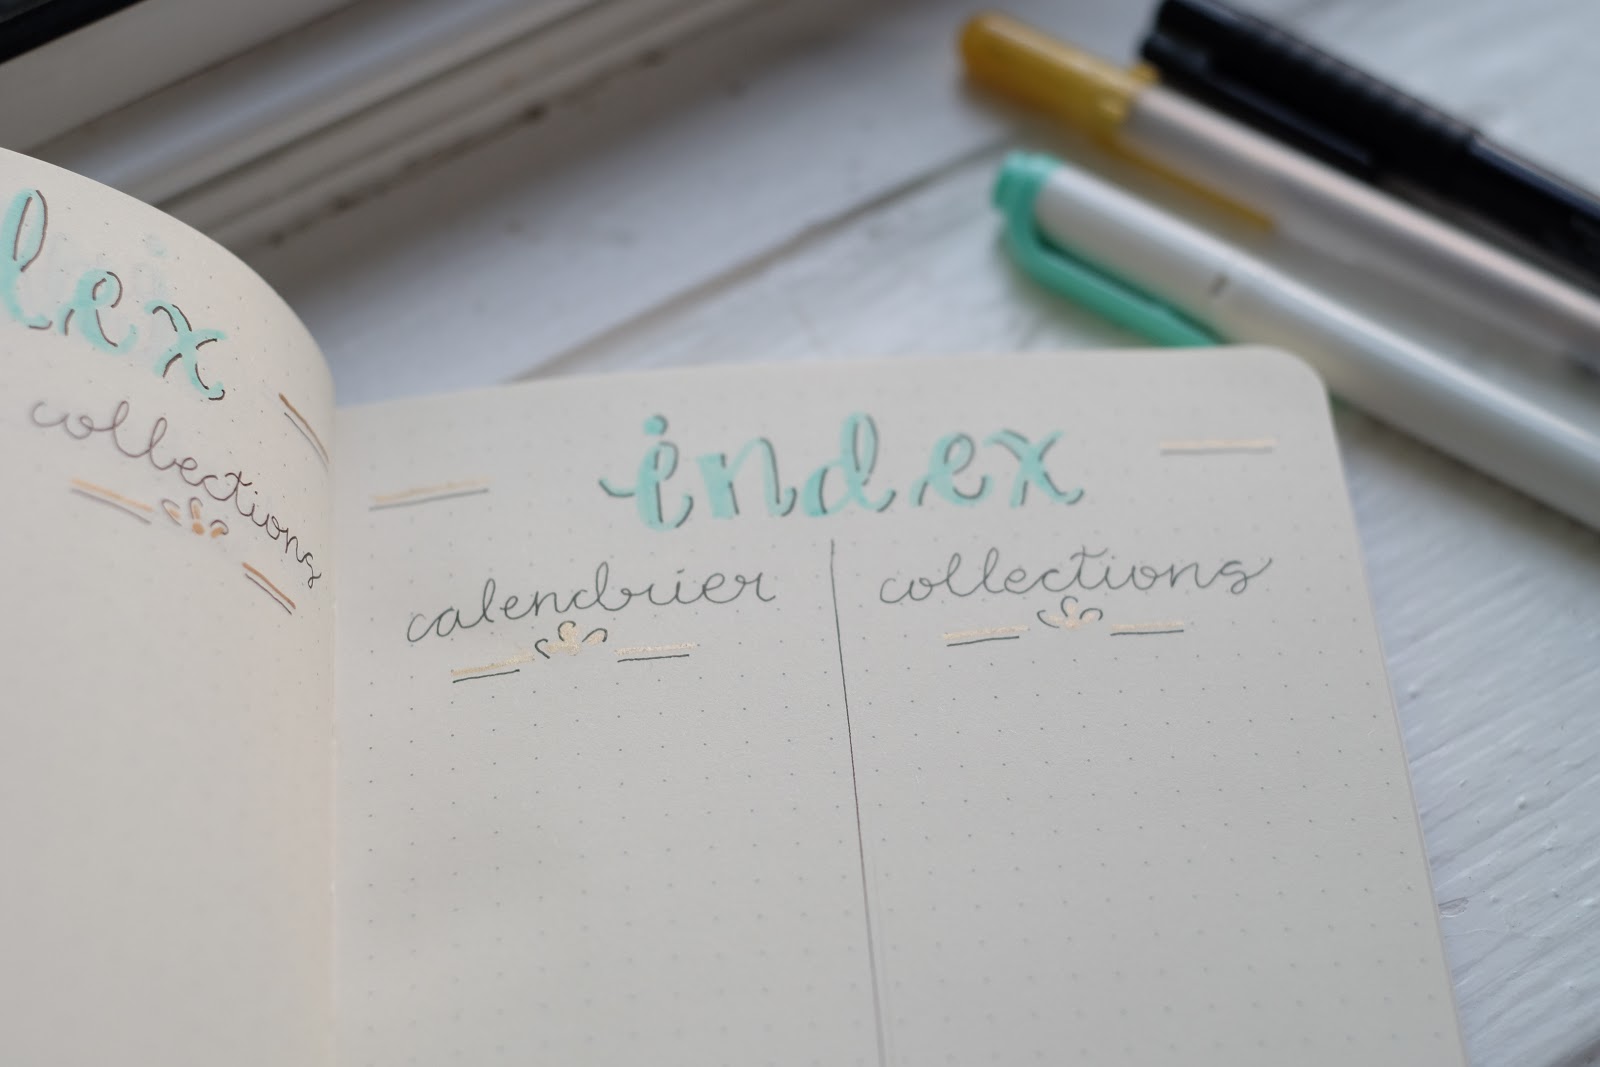
This time around, I wanted to change the index up a bit (though I am going to stick with four pages). I was talking to a friend at lunch last week who asked me if I'd ever seen the two column index. This version includes a column for calendar related pages (ones you are less likely to go back to) and another for collection pages (lists, etc. that you might refer to often - more on this to come!). After scrolling through my Pinterest board for inspiration, I discovered that I had in fact pinned this very design. It felt like a sign that it was worth trying. I really loved the sea green, black and gold theme used in my key and chose to carry that through to my index. This was totally a personal preference - you can design this in any way you'd like! I love the little globes (washi tape purchased at Hobby Lobby). You can tell my European travels are on my mind... 


I'm excited to see how the two column index works for me and I will let you know if I recommend it! Whichever route you take, the index is an important piece of your journal. Because a bullet journal flows fairly freely, things end up where they end up. Having a quick reference makes journal use incredibly efficient and friendly. 

Happy index creation! I would love to see photos of what you create! Tag me on Instagram. You can hashtag your images #fdstlbujosetupseries. I'm always looking for new inspiration. :) 


Warm wishes from me to you,
Lauren 


April 24, 2017

Bonjour BuJo (n°4): Setting Up the Key


Bonjour readers! A few of you have expressed interest in this BuJo "set up" series and your voices have been heard! A fresh new journal makes you giddy to get started, and I am going to do my best to roll out this "set up" series at a pace that doesn't rush you, but that also gives you what you need when you need it. The series will feature BuJo foundations and by summer, you should have tools to run wild with a fun summer project! Before we get rolling on this series, a few things to keep it mind:

*Make your journal your own. Your journal will not be quite like anyone else's journal, as the bullet journal is specifically meant to suit your needs. I am here to provide a jumping off point and hopefully you will find a few ideas/designs that resonate with you, but I am by no means the knower of all things BuJo. Search the web, get on Instagram, check out Pinterest, and talk to other journalers as you discover what works for you. You can view my Pinterest inspiration board here. It has taken me about eight months, and I have finally begun to figure out what works for me (though my needs are honestly ever changing and my journal is still evolving).


*It won't be perfect and that is OK! There are pages you are going to be really darn proud of, and pages you will want to turn faster than you can blink, never looking back. (Dramatic, right? But I know you get me.) Don't lose sight of the bullet journal's essential purpose: to streamline. Streamline your calendar, planners, journals, lists, etc. You want to increase productivity and stimulate creativity - but this should be a positive experience! There WILL be crooked washi tape and misspelled words, but ultimately this process should bring a sense of focus. If the beautifying part isn't your thing - that's OK! If you want to try to add some embellishment but feel inexperienced, just try it out! You will learn and grow as you go. I tell my students that mistakes make learning happen every day ... sometimes that's hard advice to take myself, but it's so true!

Now let's get to the fun part. :)


The key is the very first page in your journal. Here, you set up the icons and symbols you will use as you make plans, create lists, set goals, find inspiration, show gratitude, etc. In my first journal I kept my key fairly simple, and I will stick to this as I begin my second journal. There are inspiration photos out there with too many icons and symbols to count. Remember, you want to streamline. If it gets too complicated, it will no longer be a useful tool. Simple is good! 


(My journal keys. Left is my new journal, right is my first journal.)

You can see that I didn't make many changes this time around, except I removed two icons because I just didn't use them regularly. I like simple designs and I'm a fan of white space, though I may end up going back and adding something above my laurel wreath eventually. That's the beauty. It can unfold in time. And a note on inspiration - the frame around my first key was inspired by the frame that hangs on Monica and Rachel's apartment door in Friends. I think I was Netflix binging at the time... :)

Update: I made my new key minutes before adding this photo to the post. Some of the gold gel pen ink has already smudged onto the adjacent white page. I told you, these things WILL happen. I had my "cringe" moment, and then I shrugged it off. It's best to just roll with it!

Key creation, while only requiring one page, will be a big part of your daily journal use. If you aren't sure what icons you will want, start with the basics: to do, completed, delayed, cancelled, and notes. You can always leave some extra white space and go back and add if you find you need another icon later. The adaptability of the bullet journal is, in my opinion, one if it's greatest qualities. 

Happy bullet journaling! Get rolling on those keys.
Warm wishes from me to you,
Lauren 

April 16, 2017

Bonjour BuJo (n°3): Design Inspiration


Last night was one of those Saturday nights were I lost track of the hour as I worked on some journal spreads for May. May is still two weeks away, and I am in no way wishing away April. I just love the promise of a clean spread, and when I see one I can't help myself but make it into something beautiful. My favorite spreads don't just appear like magic on the page. A lot of careful planning goes into the process. 

My first step is usually to consult my Pinterest board and scan the latest posts of my favorite BuJo Instagrammers (so many inspiring ones out there!). From there, I think about color scheme, embellishments, and overall layout. 

*Color Scheme:  Starting with a color scheme gives my spreads a more cohesive, finished feel. I know my black pens will always be a key player, so I begin by pulling shades from my drawer of colored pens and highlighters

*Embellishments: I might also grab a few rolls of washi tape that I feel fit the overall vibe I am going for. I've been playing with stamps and ink lately, so I will pull those items as well if I feel they will be a nice touch to the page. If I think I want some shine, I pick a metallic gel pen or two. 

*Overall Layout: This is where seeing images of other journalers' spreads really helps. I typically make weekly spreads ahead of time because I love to see my week at a glance, and my busy weeks don't always allow me time to work on spreads. Making the whole week at once ensures that I will be prepared for any plans that come up or ideas that pop into my head. When creating a layout, I consider what I will need to include. Spaces for daily plans and to dos are a must. For this spread, I also included a tracker (more to come on this) as I am working on exercising, reading, and studying French every day. I've also discovered a need for a special to do list for blog work. :) 

Here are some pictures that inspired the spread I created last night, along with my final product. You can see that I have taken inspiration from several places and pulled different elements to make the spread my own. 


(left: design inspiration + right: my final spread)

What inspires you when you BuJo? I would love any recommendations for blogs, Instagrammers, etc. Let me know in the comments!


Warm wishes and little inspiration from me to you,
Lauren 

April 12, 2017

Bonjour BuJo (n°2): Journaling Essentials (and extras)


Whether you are totally new to bullet journaling and gearing up for my spring/summer Bonjour BuJo set up series, or you already love to journal and just want new ideas and recommendations, this is the post for you. Today we talk bullet journal supplies: essentials and extras. 

If you stay true to the original concept of a bullet journal, you can technically start with any pen and any notebook. That said, the creative in me was looking for a way to integrate art and design with the practicalities a bullet journal provides. I knew that for me, bullet journaling was not only about streamlining my calendar/planner/various journals/lists, but also about the ability to design a journal to suit my specific tastes and aesthetic. 

There are a wide variety of supplies on the market that are great for bullet journaling. It can be overwhelming to decide which supplies are the best quality, what you really need, and where to start when setting up for your first journal. On top of that, you want to be kind to your wallet - it would be really easy to spiral out of control buying fun colored pens and adorable embellishments! Here, we are going to try to keep it pretty simple. I'm in to this whole capsule trend (capsule wardrobe, capsule make up collection...). There's something that comforts me about having exactly what I need, not too little, not too much. With that idea in mind, we will consider this list a "capsule" bullet journaling supply list of sorts. 


The Essentials


1. The journal.
My first journal was done in a soft cover, large (5x8.5in), dotted Moleskine. This lasted me a full 9 months. It was thrown into various totes and purses and held up incredibly well. I loved the durability, the size was easy to carry with me, and I've just always been a Moleskine fan. This journal didn't disappoint. I liked it so much, I've committed to the same journal for BuJo n°2. This time I added a special detail - my initials on the cover embossed in gold (Moleskine has a free personalization promotion going on right now). 

A lot of journalers speak highly of the Leuchtturm1917 journals. These come in a wider range of colors and have the added benefits of pre-numbered pages and a built in table of contents (I will talk more about this in a future post). I've considered trying one, but I'm sticking to my Moleskine because I love the entirely blank slate. I enjoy adding each and every detail to my bullet journal by hand, down to the numbers on the pages. You just have to decide what works best for you. :) 

2. Black pens.
I use these on every single page in my journal. Faber Castell black fineliners in various widths are my favorite. This allows you to create different lettering styles with ease.

3. Colored pens.
A must for bringing your pages to life, Staedler Triplus fineliners are my favorite. I started with a 12 pack but quickly realized the 36 pack was worth the investment. The best part about purchasing both of these pen sets (black and colored) is that even if you abandon your BuJo you will be left with some really nice pens that are great for every day use. 

4. Washi tape.
Just a few rolls of fun colored or patterned washi tape for spicing things up. :) 
(Michael's and Hobby Lobby both have fun options!)

For a long time I stopped at these four essential supplies. I was just getting started, and I didn't want to invest too much into my bullet journal if there was a chance of not sticking with it.

Of course, I did stick with it... and so my "capsule" supply collection has grown a bit. Here are a few of the things that can take your page designs to the next level, still without going overboard. If the essentials are your staples, these extras are your fun accessories. 


The Extras 


1. More washi tape. 
I don't know why this stuff is so addicting. I feel like I can't ever get enough, but I also try to keep myself in check. I bought a small plastic three drawer set at Marshall's. I vow to keep one drawer for washi tape. If I can't fit my rolls there, I know I've gone overboard and rein it in. 

2. Highlighters.
These Midliner highlighters are almost turning into an essential for me. The soft, muted shades aren't your typical highlighter fluorescents, and they are great for adding small details and making things pop. 

3. Acrylic stamps and ink. 
This was a splurge for me, but as dedicated as I am to my journal, it was worth it. I use this acrylic stamp block with these stamps (also lots of cute options for these in the Create365 section at Michael's). Versa Magic inks come in beautiful shades, dry quickly, and won't bleed through the page. I went with a classic navy that would look good on almost all of my pages. Again, I don't want to get too crazy buying tons of colors.

4. Gellyroll pens.
I am a lover of metallics, especially gold and copper. I love these for adding some shine to my pages, but beware, they smudge if they aren't completely dry. 

5. Fun paper clips and binder clips.
Check the dollar bins at Target and Michael's. These are awesome for marking favorite pages or keeping track of your current spot in your journal.

As you can see, these extras doubled my supply collection, but I assure you this happened over time, and all of this fits in a small basket under my coffee table. I'm a big proponent of buying that which I will truly use (in all aspects of life) and I stay true to that with my bullet journal as well. 

I hope these suggestions are helpful! Do you have any favorite supplies that you think my list is missing? Even though I try to keep it simple, I'm always open to new ideas. Let me know in the comments!


Warm wishes from me to you,
Lauren 


April 10, 2017

Bonjour BuJo (n°1): Logging Your Reading

Today I'm launching my first series on the blog, Bonjour BuJo. This will be a series dedicated to all things bullet journal (often nicknamed the BuJo by avid journalers). Bullet journaling has taken the Internet by storm. You can find information about bullet journaling on Pinterest, Instagram and many blogs. But for those of you who aren't familiar with bullet journaling, it all began with a simple concept that you can read more about here. Along the way, journalers have put their own spin on the system, customizing and creating to meet their own personal needs. 

Often times our greatest inspiration comes from our closest friends. I have to credit my bullet journaling journey to my best friend Alex. She introduced the bullet journal to me about 8 months ago, and now I can't imagine life without it. My bullet journal has truly become my "home base", my hub for weekly plans, upcoming events, dates to remember, habit trackers, lists, ideas, thoughts, and beyond. On top of all of that, it is the perfect creative outlet that I had been craving. 

Coming this summer, I will outline the entire process of beginning and keeping a bullet journal starting with a completely blank slate. Until then, I will be sharing some of my favorite ways to use my bullet journal. I hope you are inspired to try some of these things too (or to create your journal in a way that works for you)!

Now to the topic of the post: using your bullet journal to log your reading. I am a lover of Goodreads and I still use this as a place to keep my "to be read list", connect with other readers, and track my yearly reading goals. That said, I still wanted a pen to paper, personal spot to keep my reading record. After listening to an episode of What Should I Read Next? that discussed logging your reading, I was inspired to begin. When logging reading, different readers prefer to record different things. In addition to the title and author of a book, you might mark the date started and the date finished, the genre, the number of pages, your rating, your favorite quote, or even abandoned books. The information you wish to keep will be based on your preference. 

I decided to go with a simple layout that included title, author, start date, finish date, genre, number of pages, and favorite quote. I wanted to track how frequently I was finishing a book, to notice patterns in genre so that I might expand into new territory, and to keep page numbers so I could have a concrete record of how much ground I covered over the course of a year. I think the quote has become my favorite part of this log. I feel that in searching for a favorite quote I read more closely, and when I select a favorite quote at the end I make sure it sums up what that particular book meant to me. When you read book after book, it is hard to remember every detail. However, remembering the feeling that book brought you can be incredibly powerful. 


 (my bullet journal reading record)

(the picks I plan to read to finish out this log, plus book darts from The Novel Neighbor to easily keep track of favorite quotes as I read) 

My goal this year is to read 24 books. I wanted to increase from my goal of 16 in 2016 (which I surpassed), but keep it reasonable enough to fit in with my busy life filled with teaching, family, friends and travel. I only made space for 12 books in this journal as I am so close to beginning a fresh one. I will continue my book logging there. 

Do you have a favorite way to log your reading? I would love to hear about your ideas in the comments!


Warm wishes from me to you,
Lauren 


Related Posts Plugin for WordPress, Blogger...